1st Practical Class: Hello, Server
(how to connect to 4IT580 server)
Connect to Server Using SSH
- You will need an SSH client
- on Windows: use PuTTY
- on macOS/Linux: use your favorite terminal
- on macOS you can use the built-in macOS Terminal.app or any other terminal app you like
Connect to SSH
-
on Windows:
-
open PuTTY
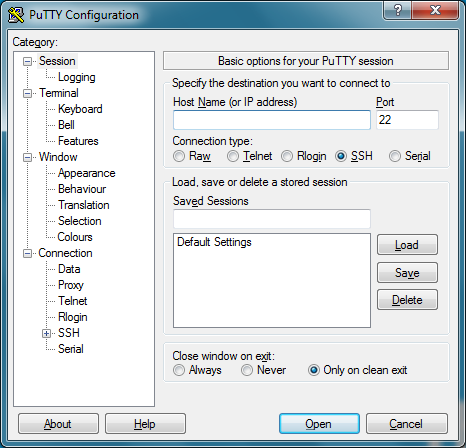
-
In Host Name (or IP address) enter:
-
Press Open button
-
You will be asked about username and password
- use SSH credential you have received in email from us
-
-
on macOS/Linux:
-
Open your terminal.
-
Enter (replace with your username):
-
You will be asked about password
- use SSH credential you have received in email from us
-
Initial Project Installation
- connect to the server using SSH
Your project should be set up automatically. Here are the steps that were done for you:
- open: https://dev-frontend--vse.handson.pro/
- replace with your username
Code Editor
We suggest using Visual Studio Code editor.
You can use any editor you like, but:
- you should be able to edit remote files over SSH/SFTP,
- it should support modern JavaScript (ES2015+) and JSX syntax.
You can use AI tools or AI-powered IDEs when working on your projects, but use them wisely.
- don't just blindly copy & paste AI output if you don't understand how it works
- always verify and evaluate the output of AI tools
- be aware that not all AI models use up to date data
Download VS Code
- Go to code.visualstudio.com and download the latest version
- Install and run VS Code
- Go to Extensions (🪟 - Ctrl+Shift+X , - ⌘+⇧+X) in the left panel
- Install these recommended packages:
Setup an SSH connection from VS Code to your remote space
-
Make sure to have a supported SSH client installed (it'll be used by VS Code to connect to the remote host)
- macOS should have it by default in terminal
- For Windows, PuTTY is not supported by VS Code,
use Windows OpenSSH Client instead
(you can still use PuTTY for accessing the SSH host via terminal)
-
In VS Code, open the command palette (🪟 - F1, - ⇧⌘P)
-
Select SSH FS: Create a SSH FS configuration
-
fill this:
- Name: (change for your username)
- Location:
-
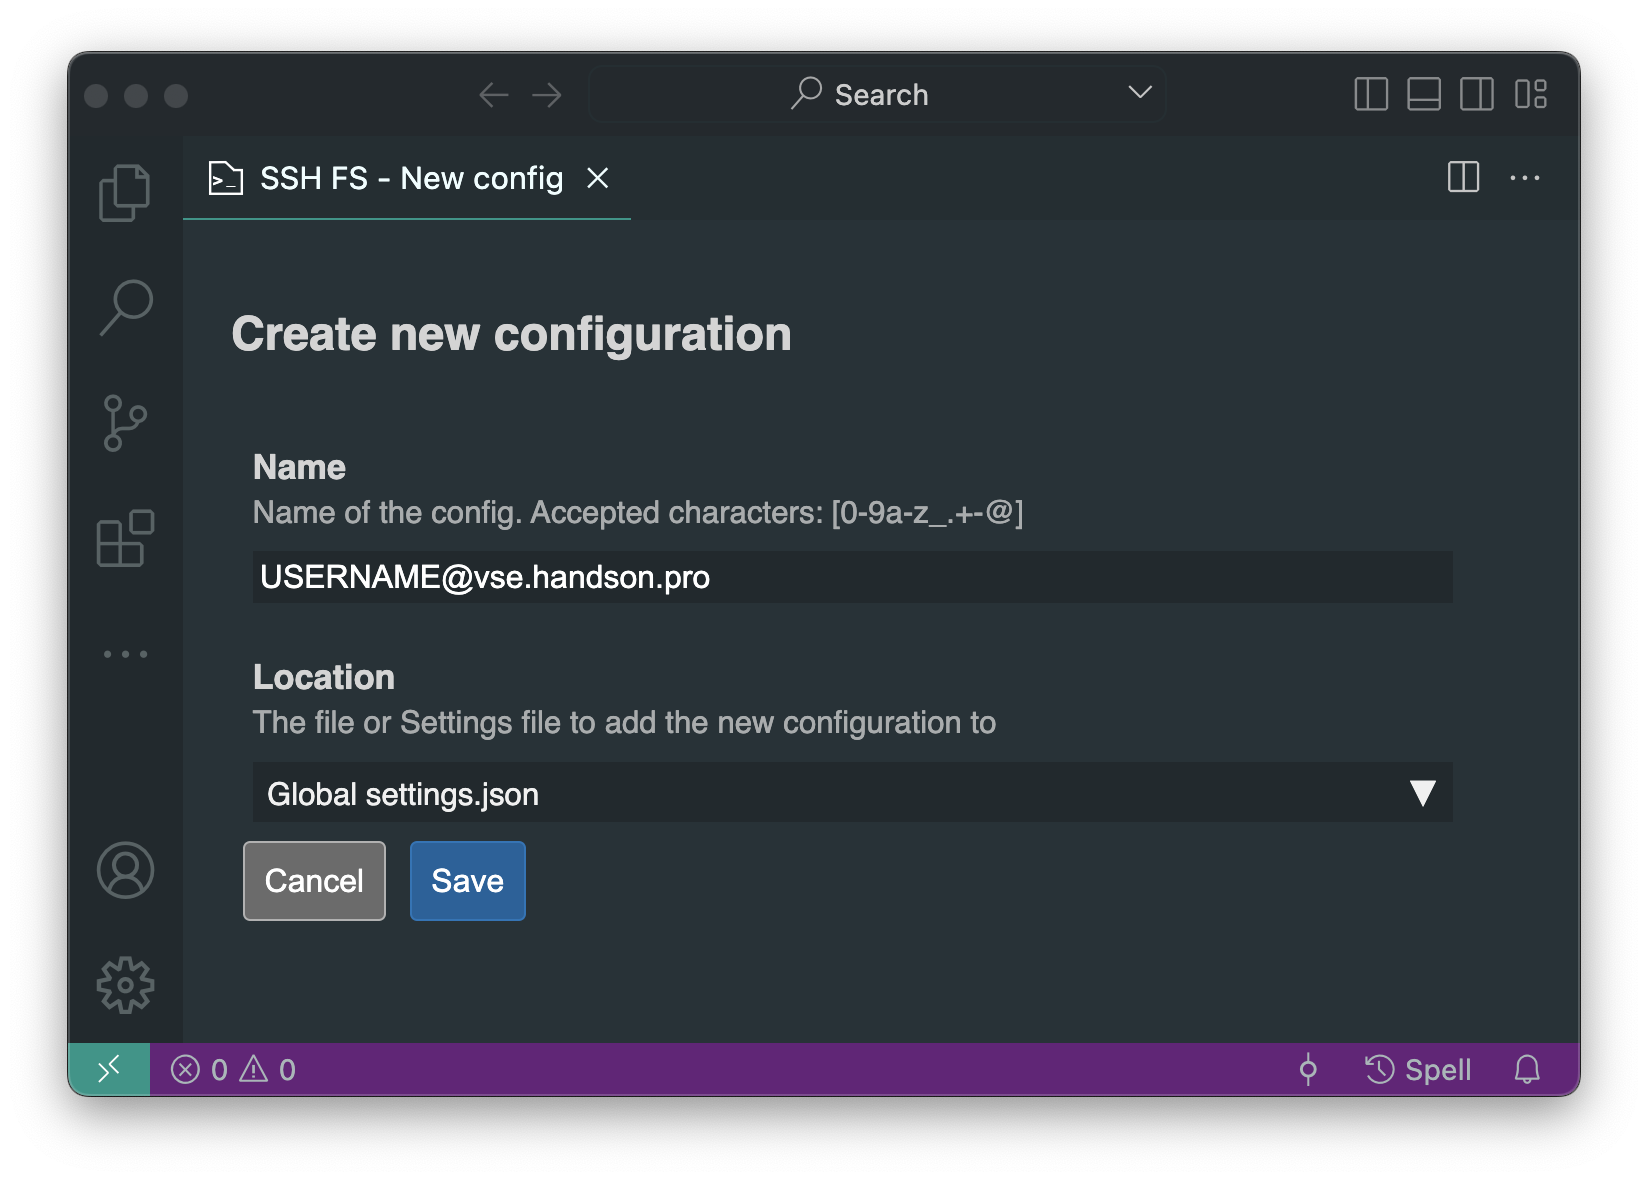 click Save
 -
new screen is presented, set following settings:
- Host:
- Root:
- Username: (use your username)
- Password: select (or type in your SSH password, if you want to save it in VS Code)
-
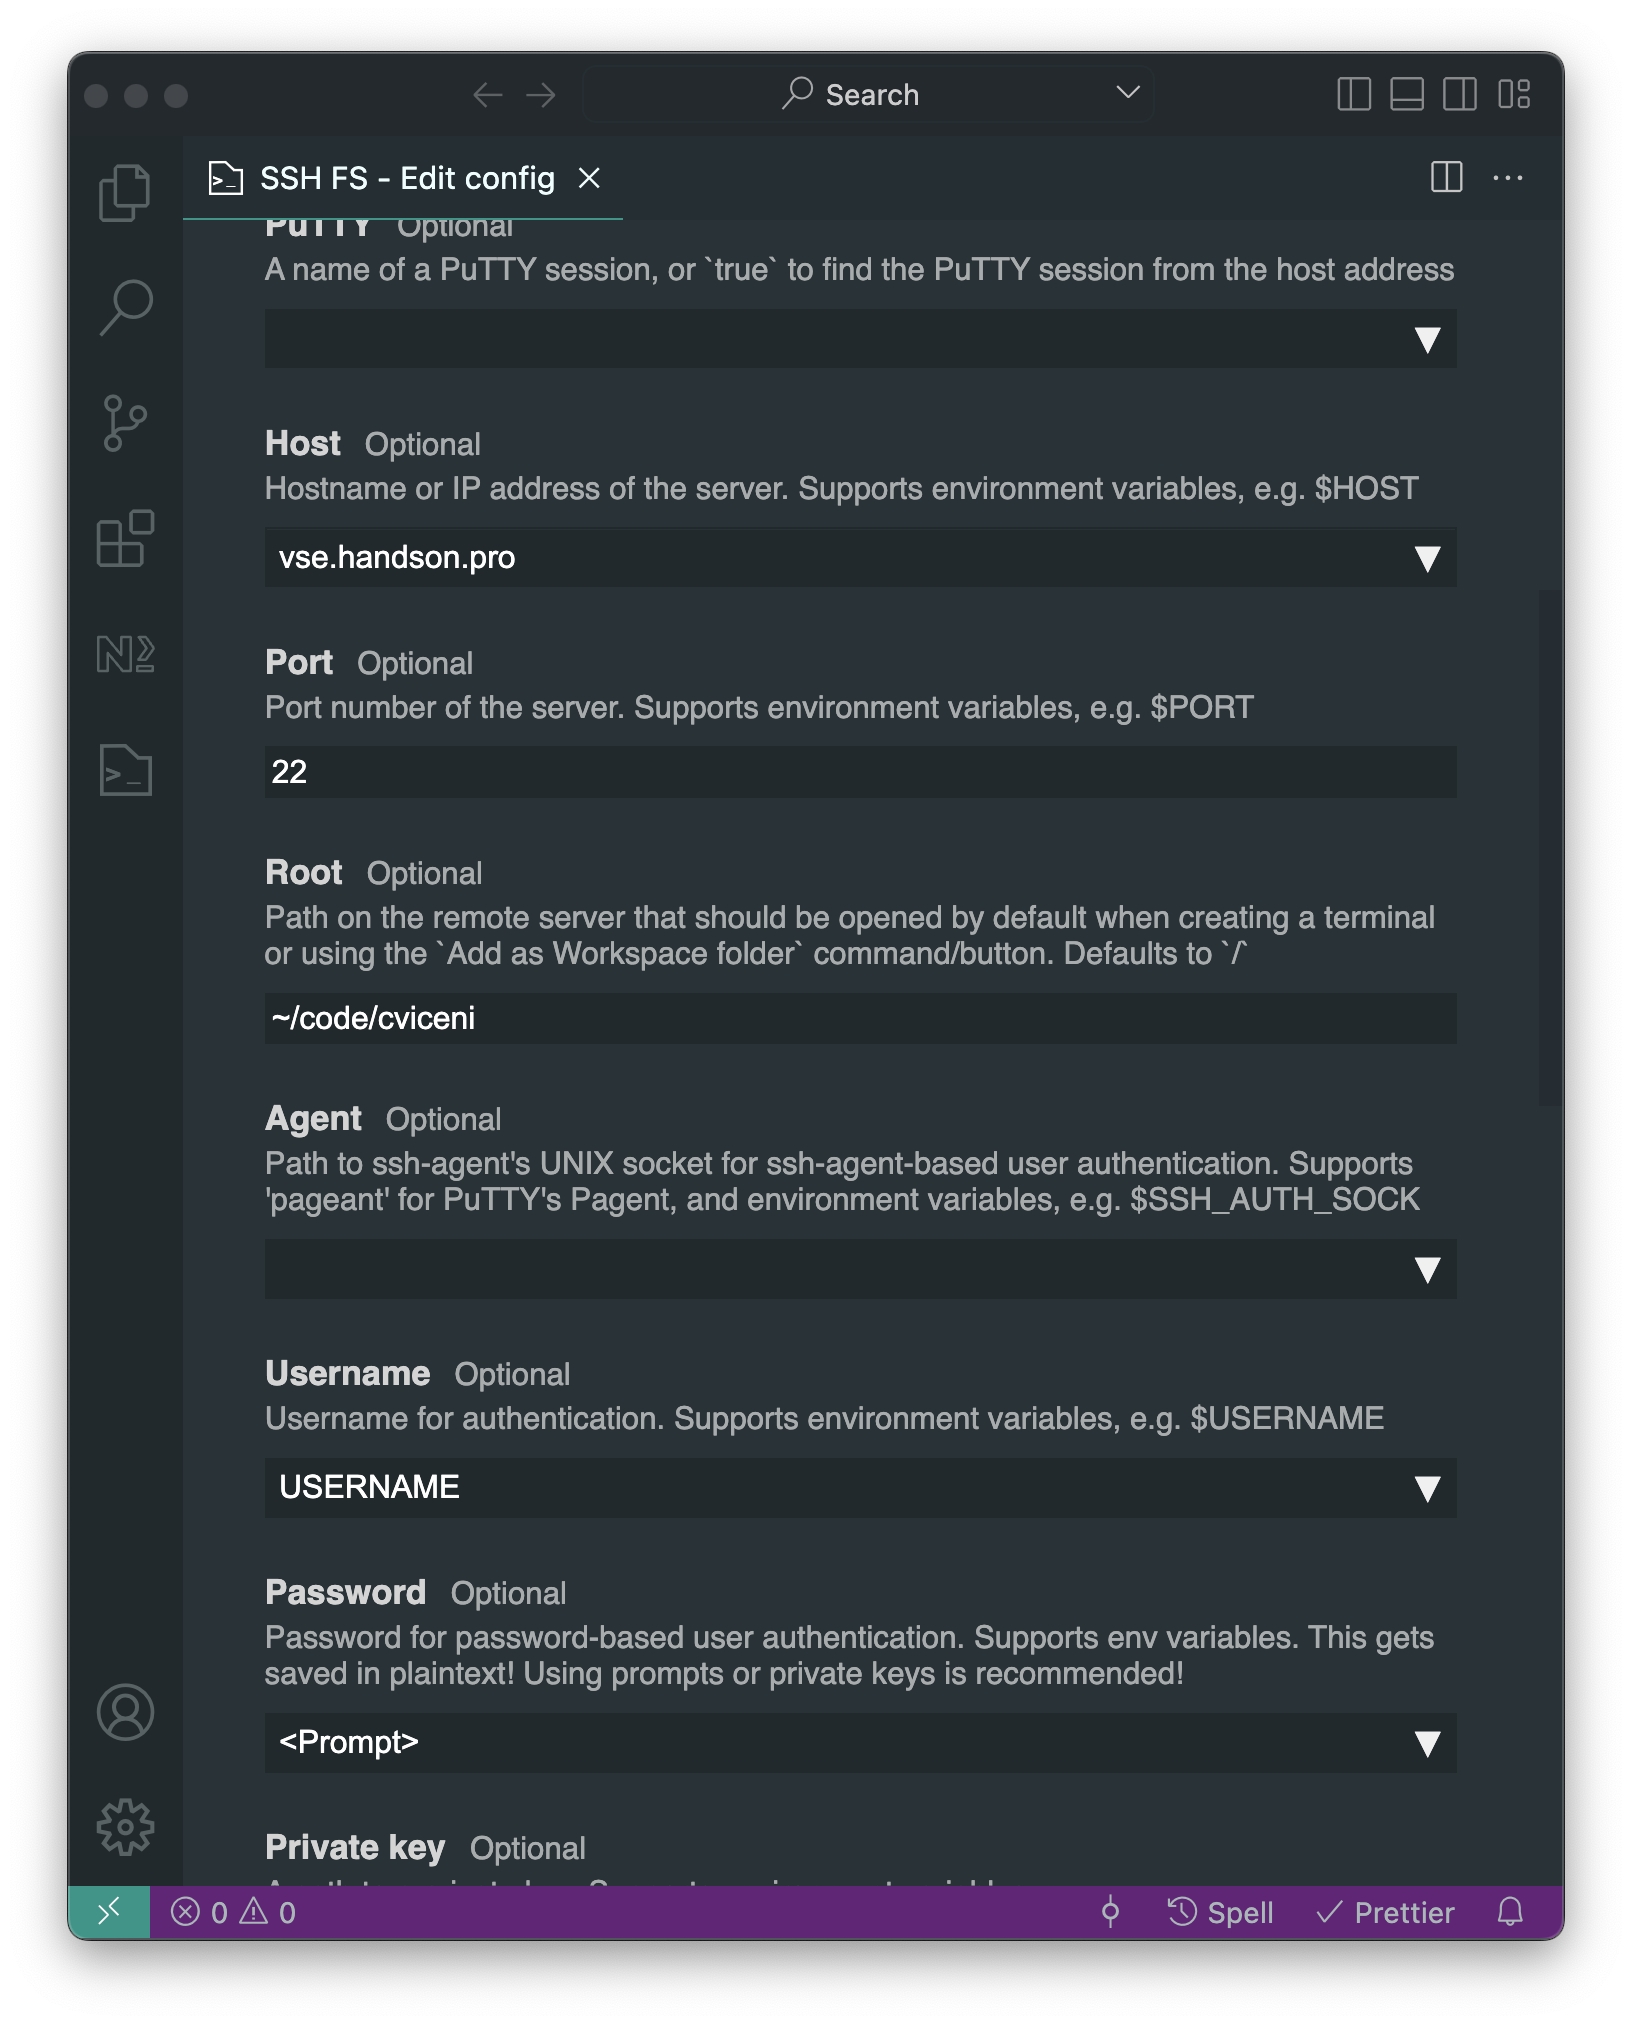 scroll down and click Save
 -
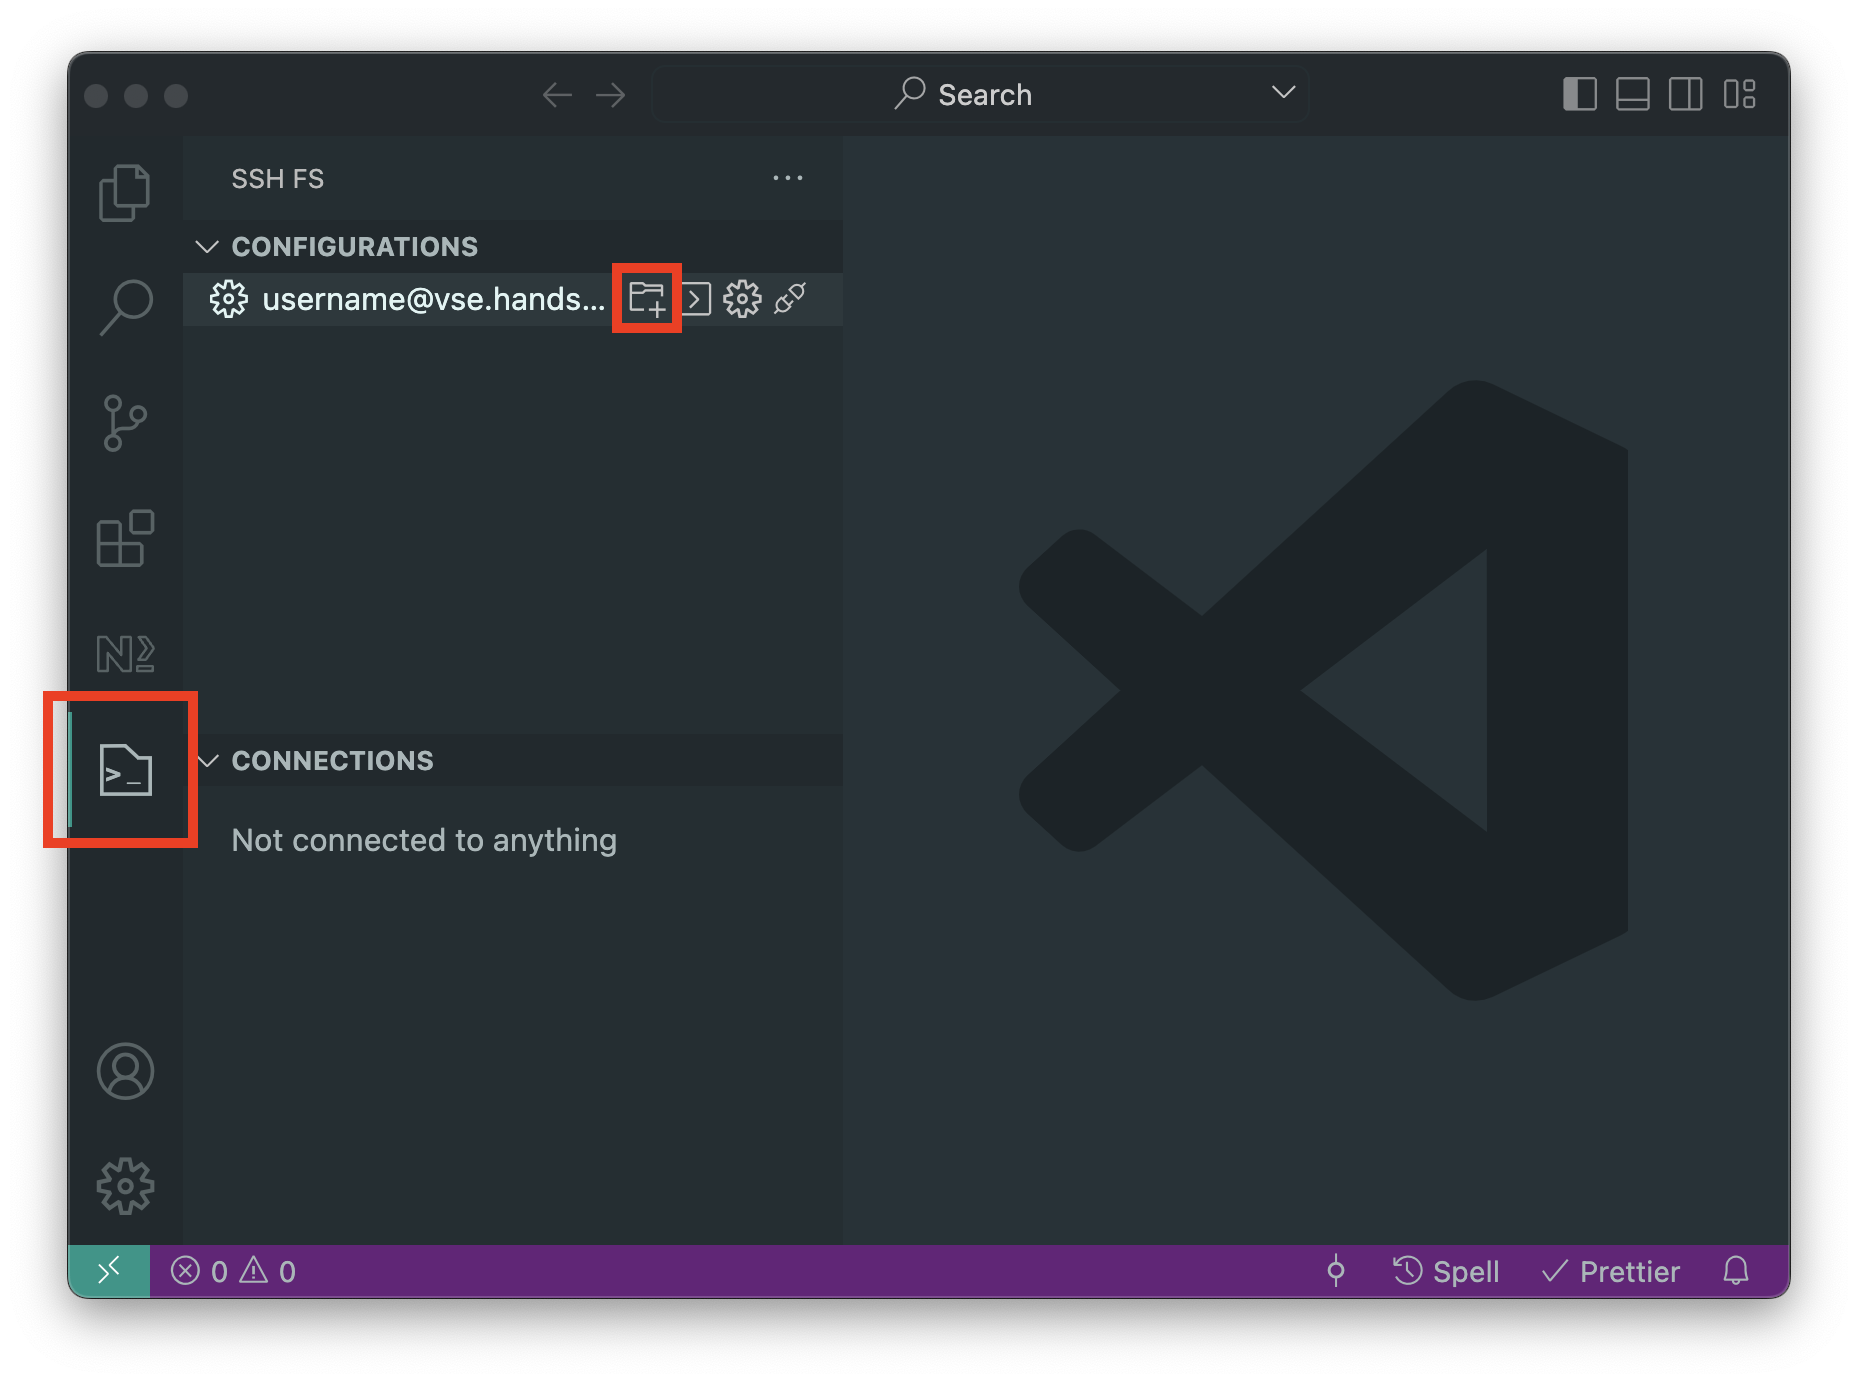
in left side of VS Code select SSH FS plugin, and select Add as Workspace folder icon next to your configuration. See screenshot:
-
it will ask you for password (maybe two times) and you can edit the project as usual
Run Frontend on Your Local Machine (optional)
Requirements
- Git - version control system
- use of command line tool is suggested
- Node.js v22 - runtime environment for JavaScript
- use of nvm - Node Version Manager, nvm-windows or Fast Node Manager is suggested
- this allows simple management of multiple Node.js versions on your computer
- to install 22.19.0 run
- to use 22.19.0 run (this may be required each time you start new Terminal session)
- to use version defined in run
- Yarn v1 (there may be some issues with Yarn v2/v3 - it has not been tested)
- installed automatically with - see README.md in the Quacker repository
- use of nvm - Node Version Manager, nvm-windows or Fast Node Manager is suggested
Clone Git Repo
Open Terminal or Command line and type:
Follow the local installation instructions in the Quacker project README.md file.